How to Brew Kombucha
After reading through some previous recipe posts that are Kombucha-based (like this SCOBY Apple Fruit Leather or these Tangy Probiotic Snacks), I
realized that some of you may want to learn how to brew some good ‘ol Kombucha!
When I was first taught how to brew Booch, it became clear to me that there isn’t
one ‘set in stone’ way to do it. Many people have their own unique techniques
or methods they believe are the key to brewing the perfect Kombucha. I love
that it is pretty hard to mess up and you can experiment with flavoring during
each batch. I started out only making ½ gallon per batch, then 1 gallon, and
for the last year I’ve been making 2 gallons per batch. These instructions are
for making a 1 gallon jar of Kombucha and you can duplicate the ingredients if
you’re feeling adventurous enough to brew large batches!
 |
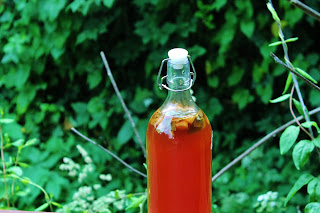
| Organic Strawberry and Chocolate Mint Kombucha |
What you will need:
- 1 cup organic sugar
- 14 cups water + extra
- 8-9 bags organic tea (Black is traditional, I usually use 1 bag of green with the black. You may also use 8-9 teaspoons loose leaf tea and then strain it out)
- 1 gallon glass jar (I use a Mason jar)
- Cheese cloth, coffee filter, or clean tea towel to cover the top of the jar
- Large rubber band
- 1 cup Kombucha (starter tea)
- 1 SCOBY (AKA: Mother, Mushroom, Symbiotic Culture of Bacteria and Yeast)
- Large Pot
- Wooden Spoon
- Funnel
- Pop Top Glass Bottles (Some people use Mason jars, but the pop top bottles hold the pressure better)
 |
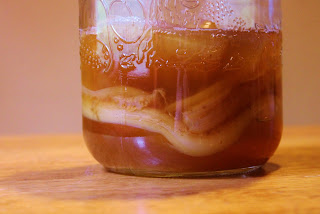
| Multiple SCOBYs in a jar |
Directions:
1. Bring the pot of 14 cups of water to a boil. Add tea and
sugar, stirring with a wooden spoon to dissolve the sugar.
2. Remove from heat and allow to cool to room temperature.
You now have sweet tea!
3. Take out tea bags and pour tea into a clean, sanitized
jar. Pour in 1 cup Kombucha (starter tea) and your SCOBY. The SCOBY may sink,
float on the surface, or hang out somewhere in the middle of the jar. All of
these are okay. Add more water to the tea until it reaches the curve in the neck of the jar, a couple inches from the top.
4. Cover jar with cheese cloth, coffee filter, or clean tea
towel and secure with a large rubber band.
5. Put your jar in a cabinet or other place out of direct
sunlight for 7-30 days, depending on your taste preference. After 7 days of
fermenting, the Kombucha will have a sweeter taste and the longer it sits, the
more it will taste like vinegar. The SCOBY eats the sugar, which results in the
different taste!
6. Using a funnel, pour the Kombucha into bottles with pop
top lids. Save 1 cup of your Kombucha to brew your next batch (as your starter
tea). Put your bottles into the refrigerator, OR you can explore more with
doing a SECOND FERMENTATION!
 |
| Check out those carbonation bubbles! |
For a second fermentation, simply add 1oz of fresh/frozen
fruit or 100% fruit juice to the bottles of Kombucha from the first fermentation.
Close the lids and put them back into the cabinet for 3-4 days. This additional
process adds flavors to the Kombucha and allows it to naturally carbonate. Now,
you can place the bottles in the refrigerator. Be careful when opening the bottles
for the first time due to the pressure from the carbonation. The anticipation
always gets me!
Some combinations of ingredients for the second fermentation that I enjoy using are:
- ginger and mint
- vanilla bean and molassses
- strawberry and chocolate mint
- blueberries and raw honey
- ginger and raisins
- Elderberry flowers and Elderberries
- Chamomile and rosehips


Comments
Post a Comment